More from Grits & Gravy

Showing posts with label Test Kitchen. Show all posts

Monday, March 16, 2015

Test Kitchen: Strawberries!


We are in full strawberry season in Florida, which I must admit is one of my favorite times of year. I could almost turn into a strawberry for the quantities that I am consuming. If you are looking for your own strawberry fix to kick off spring, try this delicious appetizer. These strawberry and goat cheese crostinis are party favorite, with a great blend of tangy and sweet. Enjoy!

Strawberry + Goat Cheese Crostinis 

Ingredients:
Sliced (or finely chopped) strawberries
Fresh Basil
Crostinis or Bagel Chips
Balsamic Vinegar
Goat Cheese, spreadable

Chop fresh basil and strawberries. Spread a fine layer of goat cheese on your bagel chips or crostinis. Assemble your delightful appetizer by placing strawberries on top and sprinkling with basil. Just before serving, give a few drops of balsamic vinegar on top. Enjoy!


Have a happy week!

Wednesday, September 18, 2013

pumpkin lush pie


Let fall commence!

In college, my chocolate version of this tasty dessert was my go to. When I discovered pumpkin pudding last year, I transformed my recipe and the outcome was scrumptious.


Pumpkin Lush Pie

2 packages of pumpkin pudding mix
1 graham cracker crust, extra filling
1 8 oz. cream cheese, softened
1 cup of powdered sugar
1 cup of milk
1 package of whipped topping
nutmeg to sprinkle on top

For the first layer, mix cream cheese, 1 cup of whipped topping and powdered sugar. Add the powdered sugar as you go to avoid bathing in it. You could also add more or less sugar based on your preferences. Once the first layer is mixed, spread in the bottom of the graham cracker crust.

For the second layer, combine the pumpkin pudding mix and milk until thickens. I gradually add the milk to obtain my desired consistency. Sometimes I add a little less milk. Once this layer is mixed, spread over cream cheese layer.

Finally, use the remaining whipped topping to cover pumpkin layer. Sprinkle with nutmeg. Chill for 1-2 hours and then serve.

Note: You could use any pudding flavors you like year round.

This recipe is so easy to pull together and quite tasty! Enjoy.

Happy Fall Y'all!

Sunday, March 10, 2013

zucchini spaghetti


I decided to use up some canned goods and veggies that I had around the kitchen for Sunday Supper. The result was quite delicious! I must admit that I was kind of proud of my creation.

The dish was perfect for a hearty Sunday evening and much welcomed after weeks of eating out due to my hectic schedule. I simply used what I had lying around so you could add all sorts of yummy things and additional veggies to take this dish to the next level. The sauce was so good that I will probably eat it over steamed broccoli later in the week.

 The roasted red peppers added a touch of sweetness which balanced out the acid of the tomatoes without having to add sugar to the dish, which many recipes call for. And, if you are a pasta lover but are eating Paleo or Gluten Free, this will certainly satisfy your craving and fill your belly. Hope you enjoy!

Zucchini Spaghetti
6 oz. can of tomato paste
28 oz. can of peeled whole tomatoes
12 oz. jar of roasted red peppers, drained
1 teaspoon oregano
1/2 teaspoon garlic powder
1/2 teaspoon salt
1 lb. ground turkey or lean beef (if using beef, be sure to drain grease)
2 gloves of garlic
1 onion, chopped
1 zucchini per person, julienne cut
Olive Oil

Sauce will make about 8-10 servings

Note: You could also make this sauce ahead of time and freeze in individual ziploc bags or split the sauce for multiple meals.

In a saucepan, combine tomato paste, whole tomatoes, roasted red peppers, 1/2 teaspoon oregano, 1/2 teaspoon garlic powder, 1/2 teaspoon of salt and simmer for 15-20 minutes over medium heat.

In a skillet, saute garlic and onion with a little olive oil. Once the onions become translucent, add meat. Season with 1/2 teaspoon oregano, salt and pepper until meat is browned.

Once sauce has simmered, pour mixture into a blender (or use immersion blender) and blend until smooth. Combine sauce with meat and allow to simmer for another 5-10 minutes until flavors are combined. 


Julienne peel a zucchini, one per person, and saute for 5-10 minutes with a little olive oil. You can also boil the zucchini for 2-5 minutes in boiling water just like regular noodles.

Pour sauce over zucchini and enjoy!

Monday, January 14, 2013

a new breakfast casserole

I used to make a mean breakfast casserole full of yummy cheese but being that I have mostly given up dairy since beginning my #fitby30 journey, I have been on the hunt for an equally delicious replacement.


Thanks to the Paleo Effect I found something quite scrumptious. I actually enjoyed this more than my former go to dish, proving that healthy food can be just as good. I suggest serving this up during your next weekend brunch or maybe for a 'breakfast for supper' night. You will be glad you did!

I amended the original recipe a bit but you can find the Paleo Effect's version here.


Paleo Breakfast Casserole
1 & 1/2 - 2 sweet potatoes, grated
4-7 links of turkey sausage (I used al fresco's country style)
4 eggs
1/2 cup of egg whites
1 sweet onion, chopped
1/2 cup of coconut milk (careful not to buy one that has too much added sugar)
Olive oil
1/4 teaspoon of salt
1/4 teaspoon of pepper

Makes 6-8 servings

Preheat oven to 350 degrees. Chop onion and turkey sausage. I cut up slices of the turkey sausage links and chopped them in the food processor to break them up.  Heat skillet and add olive oil. Saute onions and turkey sausage with a pinch of salt and pepper until onions are translucent and sausage is cooked.


While the onions and sausage are cooking. Peel and grate your sweet potatoes. Grease your baking dish and add the grated sweet potatoes, creating the first layer. Then add the onion and sausage to make the second layer.


Finally, whisk eggs, coconut milk, and egg whites with salt and pepper. Pour mixture over the other two layers. Bake dish for 45 minutes.

I enjoyed my serving with some sweet Florida strawberries. Delish.

Happy Eating!

Tuesday, July 17, 2012

Breakfast Cups

Breakfast is my favorite meal of the day and I get pretty habitual with what I'm eating. To start of my day I have egg whites with veggies, fruit and green tea. Since I have been feeling a little bored with my routine I decided to try baking them. One word = delish!

Baked breakfast cups
Egg whites
Bell Pepper, chopped into cubes
Green Onion, chopped
Salt and Pepper to taste
Cooking Spray
Note: I used bell pepper but you could use any veggies you like

Spray your muffin tins with a non-stick spray. Place bell pepper and green onion in muffin tins. Fill with egg whites. Add salt and pepper. Stir mixture with a fork. Bake at 375 degrees for 20-30 minutes.

The best part of this breakfast is that it is loaded with veggies, simple, and you can pop these in the oven while you shower or go about your morning routine.

Healthy Tip: I chop up all of my veggies on Sunday so that I can easily throw together yummy, healthy meals during the week. With my veggies already prepped, it takes me less than 5 minutes to put together this meal.

Step 1

Step 2

Enjoy!
Happy Eating! x.

Thursday, December 29, 2011

Holidays at the Espinolas

A few weeks ago, one of my favorite Tampa families generously hosted  a few of us for a dinner party at their home. The night was full of scrumptious food and lots of laughter! Jen and Wayne are excellent hosts that create a warm and welcoming atmosphere. They also excel in creating delicious dishes for us to enjoy!


For the holiday party, Jen and Wayne brought their A game in the kitchen. For appetizers, we enjoyed bacon wrapped scallops (a personal favorite) and a crostini topped with a chicken and cheese mixture. Of course, no party is complete without a signature drink. We sipped on buttertinis and sparkling wine.


The dinner menu was nothing short of YUMMY! The meal began with this fabulous Roasted Pear with Blue Cheese salad. This starter would be an excellent addition to any dinner party you are planning or an excellent choice for a dinner for one special.

Our fabulous hostess in her kitchen

Before: Pears with Blue Cheese

After: Great starter to any meal

We also feasted on ham, mashed potatoes, rolls with a herbed butter, and fresh green beans. We topped the meal off with a buttery shot and tiramisu trifle for dessert.

Our host bringing out the after dinner delight

I cannot describe how amazing this was!

As a parting gift, we all received a Christmas Pickle. The tradition is that when decorating the tree, you hide a pickle ornament in your tree. On Christmas, everyone searches for the mystery pickle. The one who finds the pickle receives a special gift and good fortune for the year ahead.


I enjoy all of the fellowship with friends and family that comes with the holidays. This event was certainly a highlight of my season. I hope you enjoyed good food and great times with your friends and family!

A special thank you to the Espinola Family for their hospitality and allowing me to blog about the special event!

Monday, December 19, 2011

Sunday Supper: White Bean Soup with Kale and Chorizo

One of my new favorite soups to make is this White Bean Soup with Kale and Chorizo that I got from Cooking Light Magazine. It is light, healthy and sure to warm up your bellies.


White Bean Soup with Kale and Chorizo
2 ounces Spanish Chorizo, finely chopped (Note: If you use mexican chorizo, remove casing)
1 cup of chopped onion
3 garlic cloves, minced
3 cups of low sodium chicken broth
2 (15 ounce) cans of cannellini beans, rinsed and drained
4 cups of chopped kale
1/2 teaspoon of pepper


Heat a large saucepan over medium heat. Add chorizo and saute for 1 minute. Add onion, garlic to pan and saute for about 5 minutes or until tender. While chorizo mixture cooks, pour chicken broth into a soup pot and bring to a boil. Add beans and partially mash with a potato masher (or fork). Add chorizo mixture and kale and cook over medium heat for about 6-10 minutes.

Yields 4 servings (about 1 1/2 cups). 235 calories; 7 grams of fat; 7.6 grams of fiber; 13.4 grams of protein, 586mg of sodium; 30.7 grams of carbs

Sunday, November 27, 2011

Dinner for one, please


The fact is that I would rather cook for a house full of people than just myself any ole day but the reality is I live alone and my cooking is usually enjoyed by just me. Last night, I decided to make myself a scrumptious meal accompanied with Norah Jones, candles and wine - date night for just me!

A few weeks ago, I visited Morgan in south Florida and we had one of the most amazing meals. I thought I could re-create this marvelous dish we shared and to my surprise it turned out just as yummy!

So whether you are cooking for a house full or just one, I hope you enjoy! It is definitely okay to make yourself a fabulous meal and love every bite!

Scallops with Cannellini Beans and Spinach
Fresh Scallops (approx. 4 per person)
1/2 can of Cannellini beans, rinsed and drained
2 strips of center cut bacon (or reduced sodium), chopped
1 cup of spinach
1 shallot, diced
 3/4 cup of reduced sodium chicken broth

In a large skillet, cook bacon until crispy. Leave behind any bacon oil or drippings to flavor the rest of the meal. Remove bacon from pan.

Rinse scallops and pat dry with a paper towel. Salt and pepper. Add to skillet to cook on each side for about 2-3 minutes. Remove from pan. Tip: To get that nice crust, don't mess with your scallops until its time to flip them.

Add shallots and cook for about 3 minutes until translucent. Add chicken broth (you may add more broth depending on how much sauce you like). Add beans and cook for about 5 minutes to let broth thicken. Make sure to get all of the bacon drippings off of the bottom to flavor sauce.


Add spinach until it begins to wilt. Then add the bacon and scallops back to dish to warm for about 1 minute. Note: Add salt and pepper to taste but be careful because the bacon, beans and broth have plenty already.

Make yourself a pretty plate and enjoy!


The aftermath

Thursday, September 22, 2011

Tailgate Special: Shrimp Skewers

Christine and I at tailgate
We enjoyed our second home game this season against FAMU. I had some shrimp in the freezer so I decided to try out a new marinade.

Herb-Marinated Shrimp Skewers
3/4 cup fresh cilantro
3/4 cup fresh basil
3 tablespoons extra-virgin olive oil
1 lime, juiced
1/2 lemon, juiced
1/2 teaspoon ground cumin
pinch of salt and pepper
2 garlic cloves
12-24 shrimp, peeled and deveined


Combine all ingredients (except shrimp) in a food processor; process until smooth. Place shrimp and marinade in bowl, tossing to coat. Marinate in refrigerator for 30 minutes, stirring occasionally. Thread shrimp on wooden skewers for cooking.


Cook shrimp in a grill or broil in the oven for 2 minutes on each side. Note: The citrus will cook the shrimp so be sure to cook immediately. I let the shrimp marinade too long and the shrimp got a little overcooked. 

Hanging out with Little Bro Joe

Sunday, September 18, 2011

Sunday Supper: White Pizza with Fresh Basil


After having a yummy carb induced coma breakfast with Mal, my body was craving.. well more carbs, particularly, a yummy slice of pizza. I decided to use some leftovers in the fridge to pull together a homemade and healthier version of the traditional pie.

White Pizza with Fresh Basil
3-4 tablespoons pesto with basil
1/2 cup of shredded fresh mozzarella cheese (substitute: skim shredded italian cheese blend)
1/2 cup part-skim ricotta cheese
pinch of pepper
1/4 cup fresh basil, chopped
1 flatout wrap for crust
olive oil cooking spray

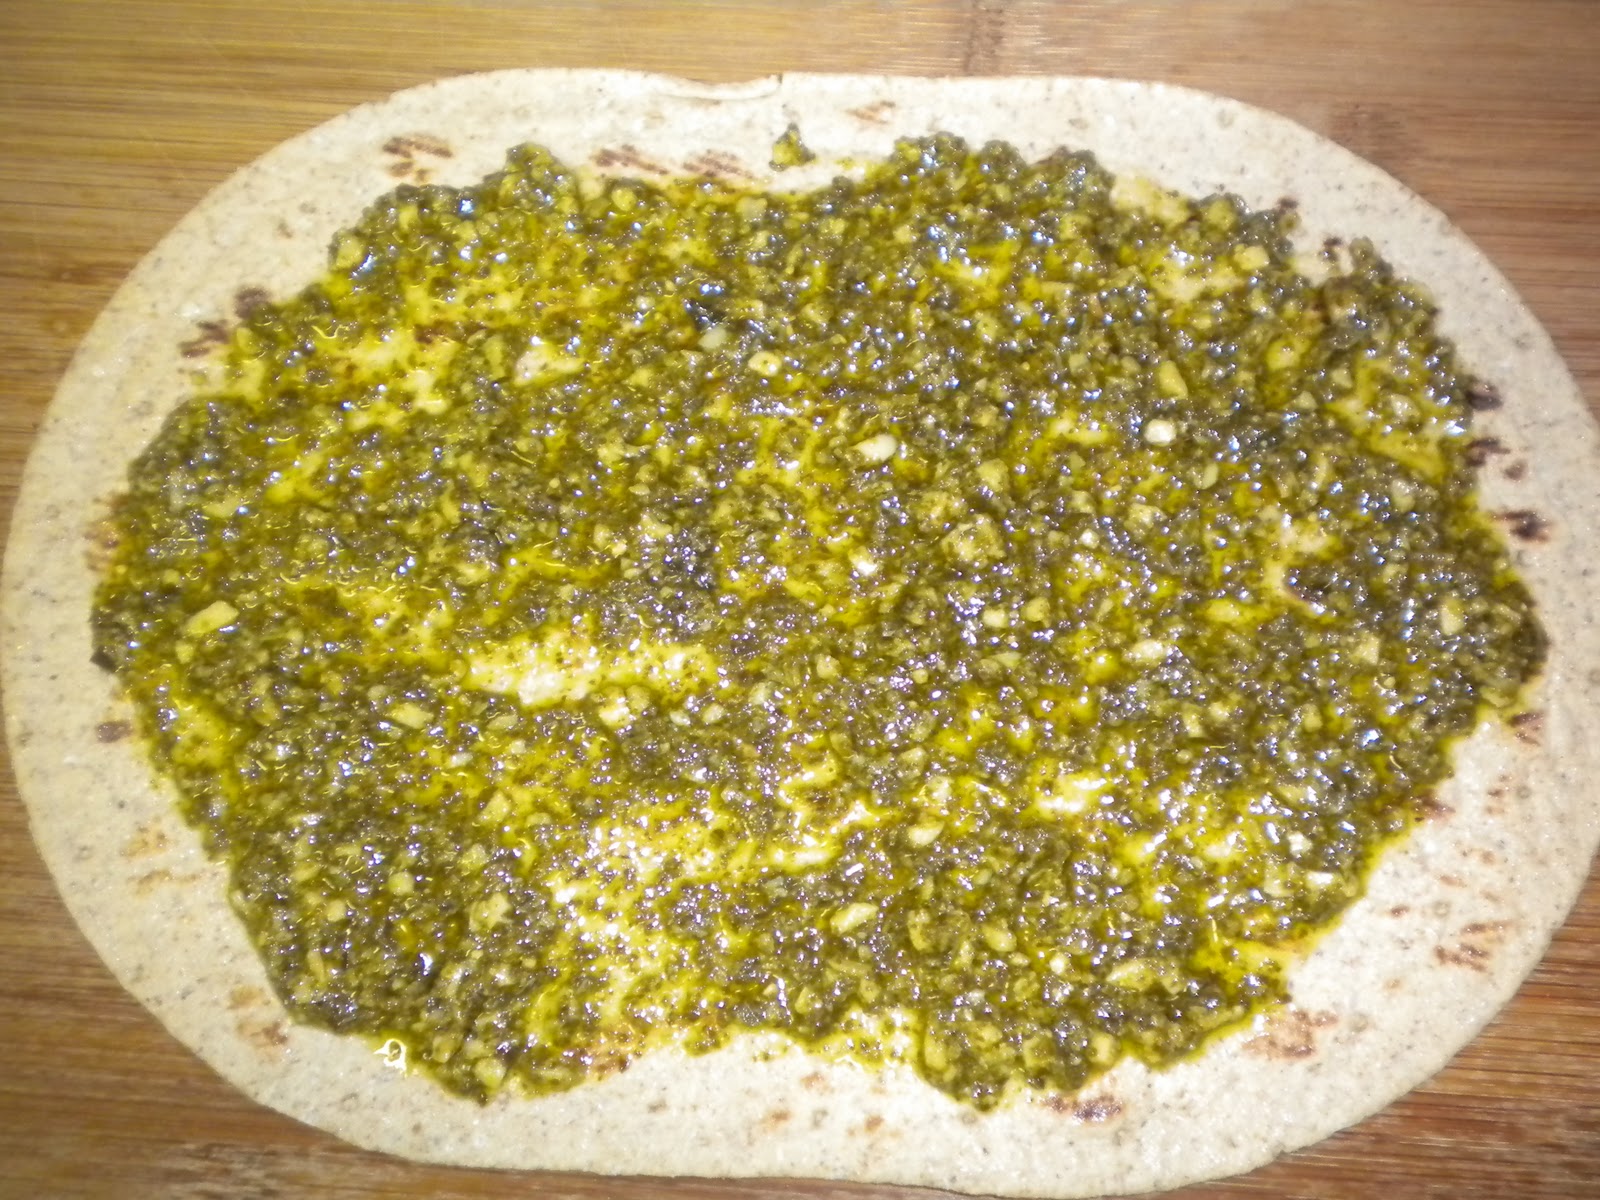
Preheat broiler. Heat baking sheet in broiler while prepping pizza. Lightly coat crust with cooking spray. Spread pesto evenly over crust, leaving a 1-inch border.


Sprinkle shredded cheese. Dollop ricotta with a teaspoon. Broil for 2-5 minutes, until cheese is melted. Top with fresh basil.

Enjoy! Happy Sunday!

Sunday, September 11, 2011

Tailgate Special: Chicken Kabobs & Guacamole

This weekend marked the first home game for the USF Bulls! I was pretty excited to break out my delish guacamole recipe and try a new chicken marinade. Both were a hit!


Guacamole

Ingredients:

2-3 avocados
1 lime
1/2 red onion, chopped
2-3 tbsp fresh cilantro, stems removed
salt & pepper
1 roma tomato, chopped & seeds removed
tortilla chips

Start with your avocados. I run my knife from top to bottom on the exterior to create a cross section of the avocado. Stab your knife into the pit and then remove it using a paper towel (to prevent slipping). I then cut vertically and horizontally to create small squares on each side. With a spoon, run it around the skin to remove the yummy avocado inside. Once you have scooped out the inner goodness, mash it with a fork.

Add the juice of a lime, chopped red onion, chopped cilantro, and chopped tomato. Salt and pepper to taste. You can enjoy immediately or refrigerate to before serving with chips.

Note: Guacamole has many uses. This recipe would also be delicious as a relish on burger or piece of chicken or on top of a salad.

Chicken Kabobs
Adapted from Epic Health

Ingredients:

4 boneless skinless chicken breasts
1 bell pepper
1 purple onion
1/2 cup low sodium soy sauce
2 tsp ground mustard
1/2 cup water
1 tbsp vegetable oil
1 tbsp worcestershire sauce
kabob skewers

Note: Add any veggies you like

Mix the worcestershire sauce and ground mustard, avoid clumping. Mix in soy sauce, water and vegetable oil. If you would like to use the marinade for basting later, set aside 1/3 cup.

Cut the chicken, bell pepper and onion into pieces. To ensure that everything cooks correctly, try and make all of your kabob items about the same size.

Thread the chicken and veggies alternately on skewers. I chose to use the smaller 6 inch skewers to make it easier to eat at the tailgate. The smaller skewers also allow you to create more servings to share.

Pour the marinade over the skewers and chill for 2-3 hours. Grill for about 10 minutes on each side or until the chicken is done.

I placed my skewers in a large tubberware dish and had them marinate in the cooler until it was time for them to go on the grill. You could also marinate the chicken before threading.

Saturday, August 20, 2011

Summer Couscous

One of my favorite summer dishes is couscous. This dish is light, fresh and is ready in a matter of minutes. Let's be honest, I live in the south and it is way too hot to be cooking a super involved dish in the heat. I enjoy this dish hot or cold so you could use it as a side, main course or in place of a salad when entertaining.

I use Near East's packaged couscous which can be found in most grocery stores. I have not yet attempted to make my own couscous but it's on my list.

Ingredients:
1 package of Near East Couscous
1 1/4 cups of chicken broth
2 tablespoons of olive oil
1 bunch of fresh basil
1/2 cup of snow peas
1/2 cup of fresh asparagus
1/2 cup of red bell pepper
Optional: Grilled chicken and/or other veggies

To prepare the couscous, combine the chicken broth, olive oil and season packet (if one is included). Bring to a boil. Stir in couscous and cover for 5 minutes. Using a fork, gently fluff couscous. Chop all of your veggies and combine with couscous.


Note: I prefer for my veggies to be raw so that there is a little crunch in my dish. You could roast or steam them if you would prefer them to be cooked.

Serve immediately or refrigerate.

Fun Fact: Couscous is considered one of the healthier grains and is a good source for protein and potassium.

Happy Eating!

Tuesday, May 31, 2011

Sunday Supper: Pulled Pork

One of my favorite dishes to make and enjoy during the summer is pulled pork. Something about this meal just screams summer to me.

On Sunday, The Smiths came over to catch up, have lunch, celebrate my arrival to Tampa, and spend some time in the pool. I took the opportunity to break out an old favorite. One of the great things about this dish is that it is I make mine in the crockpot so you fix it and forget it until its time to eat. I enjoy being able to spend time with my guests rather than being tied up in the kitchen the whole time.

Momma suggested this rub for the pork and it was divine. The meat came out so tender and yummy. Definitely make this dish because it is sure to be a crowd pleaser. You could also adapt this recipe for chicken.


Pulled Pork
Serves 8

2 lb. pork tenderloin
1/2 cup of chicken broth - you really could use any liquid, I happened to have this on hand
BBQ Sauce
Buns to make a sandwich
Any side fixings you might fancy

Dry Rub Ingredients, Courtesy of Tyler Florence
3 tablespoons paprika
1 tablespoon garlic powder
1 tablespoon brown sugar
1 tablespoon dry mustard
3 tablespoons coarse sea salt

The night before wash and dry the tenderloin. Apply the dry rub thoroughly to cover the tenderloin. Be generous. Refrigerate for at least one hour or overnight.

Note: If you forget to do this ahead of time, it is no big deal. Apply it before placing in crockpot. It tastes better the longer it has to season the meat.

Place the seasoned tenderloin with chicken broth in crockpot. Cook on low for 6-7 hours until tender. The meat should fall apart. To get the "pulled" effect, use two forks and gently pull the meat apart while it is still warm. Serve immediately.

Your guests could enjoy this on buns or without. This dish could also be frozen and is great for leftovers.

Of course, the most important part of any meal is the ones you are able to enjoy it with. I have been friends with Melissa and Derek for nearly ten years. Mel, my fellow dip queen, made my favorite dip and we had lots of girl talk. Y'all know that I love me some babies. Lucky for me, The Smith Family includes two little pumpkins who sweetly call me "Aunt Jessica". I always cherish my time with them. I am happy to have been able to share my Sunday with such dear friends.

Derek and Madi Kate enjoying the pool

Little Connor relaxing

Girl Time with Melissa

xo. JM

Wednesday, February 16, 2011

Italian Club Sandwiches

Confession Time. I am vain about how food looks. When I enjoy food, I want it to be pretty and made with a little extra love. Honestly, I get totally grossed out when food looks slopped on the plate - guess that is why I am not a huge fan of buffet restaurants. Maybe I take a little bit longer to slice up cake or dirty up an extra dish so that it is on a pretty platter but I think it is worth it. Presentation is important to me because it shows that a little extra something went in to it.

I find myself drawn to recipes that look delicious and will certainly be beauties on the plate. These Italian Club Sandwiches look so yummy sliced up with all of the layers and make a great addition to any spread. I made these sandwiches months ago for Book Club and then I whipped them up again for a Super Bowl Party.

There are a several steps but do not let that intimidate you, it is super easy.


Recipe adapted from Giada De Laurentiis, Everyday Italian.

Italian Club Sandwiches 
1 Round of Focaccia bread
Pinch of Salt and Pepper
4-6 Slices of Bacon or Turkey Bacon
1/2 cup sun dried tomato pesto
4 ounces thinly sliced turkey
4 ounces sliced provolone cheese
2 eggs
2 tablespoons heavy whipping cream
Butter or Olive Oil Spray

Note: You could also make these vegetarian friendly by substituting meat for veggies. You could also just add veggies to make it a bit healthier or to add extra layers of color. Spinach and/or bell pepper would be great additions.

Step One: Egg Crepes
Whisk eggs and whipping cream with a pinch of salt and pepper. Heat a small skillet on medium, add butter or spray to coat pan. Add half of egg mixture, swirl around so that it coats the bottom of the pan. Cook egg crepe until set, about a minute or two. Invert skillet to drop the crepe onto plate, allow to cool. Repeat to make second crepe.

Step Two: Bacon! My fave
Cook bacon until crisp. I prefer to cook my bacon in the oven on 350 degrees for about 10 minutes or until done. I place a cooling rack (for baking) over a cookie sheet and pop in the oven. The clean up is so easy and you can multitask. Just watch the bacon because it can burn quickly.

Note: I substituted turkey bacon because some of my friends do not eat pork. Sometimes I make two loafs of the sandwiches and do one with bacon and one without.

Step Three: Toast bread
Cut the focaccia bread in half horizontally. A bread knife is the easiest but use what you have. Brush a little butter or olive oil and heat on griddle for about 2-3 minutes, cut side down.

Step Four: Layers
Spread pesto on each side of toasted bread. Starting with the bottom piece begin to build layers. Place egg crepe on bottom. Add turkey, provolone, bacon. Repeat layers. Place top of focaccia half on layers.

Step Five: Slice and Serve
Slice into desired size wedges. My preference is bit size sandwiches but I made them a little bigger for the party being that it would be supper time. To hold sandwich together, place a toothpick through each sandwich.

Happy Eating!

For more pictures, click through slideshow.

Saturday, February 12, 2011

Walnut & Blue Cheese Grapes


Ready for a scrumptious treat and a hit at your next party? I have it with these Walnut & Blue Cheese Grapes!

These little goodies are so yummy and easy. My cabin fever during the snow storm in Arkansas led me to have a DVRathon of Food Network shows logged on my tv. When I watched Giada whipped these up and I knew I had to try them out and they are delish.

Recipe Courtesy of Giada De Laurentiis, Giada at Home.

Walnut & Blue Cheese Grapes
2 ounces (1/4 cup) cream cheese, room temperature
2 ounces (1/4 cup) blue cheese, room temperature
1/4 cup heavy cream
2 dozen red grapes, chilled
4 ounces (1 cup) finely chopped walnuts
2 tablespoons sugar
2 tablespoons finely chopped parsley

Line a cookie sheet with parchment paper.

In a food processor, blend cream cheese, blue cheese, and cream until smooth. Place the mixture in a bowl. In another bowl, mix the walnuts, sugar, and parsley.

Now set up the assembly line. First place about 4 or 5 grapes at a time in the cheese mixture and coat well. Spoon the grapes in the walnut mixture and coat grapes with a fork. Place grapes on lined cookie sheet. Repeat until all grapes are done. Chill for 2-3 hours.

Note: You could even make this recipe a day ahead and store in an air tight container.

Enjoy!

Friday, January 14, 2011

Chocolate Chip Tea Cookies


My Junior League cookbook is delivering yet another delicious treat... Chocolate Chip Tea Cookies. Perfect for your next gathering with the girls!

Chocolate Chip Tea Cookies
1 cup (2 sticks) butter, softened
1/2 cup sifted confectioners' sugar
1 teaspoon of vanilla extract
2 cups unbleached all-purpose flour
2/3 cup finely chopped walnuts or pecans, optional
2 cups (12 ounces) semisweet chocolate chips

Beat the butter and sugar in a large mixing bowl until creamy. Beat in the vanilla. Add the flour and walnuts, gradually. Beat constantly until combined. Stir in 1 1/2 cups of the chocolate chips.
Shape cookie dough into 1-inch balls and arrange the ball 2 inches apart on an ungreased baking sheet. Bake at 350 degrees for 10-12 minutes or until golden brown on the edges. Cool on the baking sheet for 10 minutes and then transfer to wire rack to cool completely.

Place the remaining chocolate chips in a heavy-duty sealable plastic bag. Microwave for 30 second and knead the bag. Microwave at an additional 20 second intervals, kneading after each interval until smooth. Cut a tiny corner in the bag and drizzle the chocolate over the tea cakes.
Chill the tea cakes for 5 minutes or until chocolate is set. Store in an airtight container at room temperature.

Makes 3 dozen.

To purchase your very own cookbook, ask me or visit the League's website.